how to create low poly models
How to create low-poly 3D models

These days the mere mention of real-time art conjures up images of meticulously sculpted models whose eye straining details have been transferred to a lower polygon game model. Although this type of artwork does seem to dominate the industry, as well as many online tutorials, there is another equally important end of the scale which needs attention.
Generating a 20,000 polygon model is one thing, but what about one with just 350? A fraction of that overly generous budget. It's this more restrictive approach to real-time modelling which will be the subject of this tutorial as we work to create a simple treasure island.
01. A good place to start
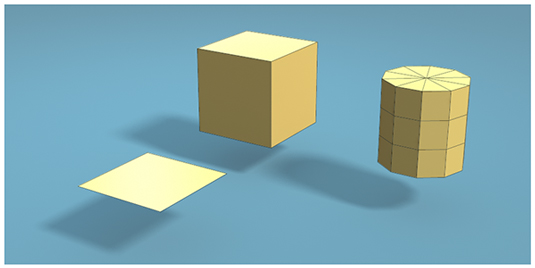
When you're working within such a tight budget you can afford to give yourself a head start and begin with basic primitives. Although simplistic, these shapes will form the foundations for each element of this scene.
02. Life's a beach
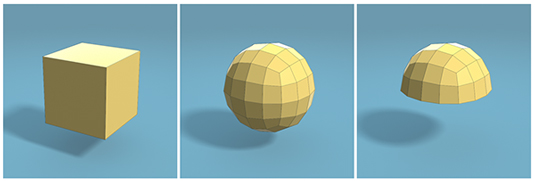
For the island you could use a sphere to be your starting point. This will give you the initial shape you need, but will also give you unwanted triangles at either end. Ideally you want to keep the model quad based to begin with.
Using a cube, with two smooth operations applied, will give you a good quad based sphere shape to begin with. This can then be halved to create the starting point for the island.
03. Not so buried treasure
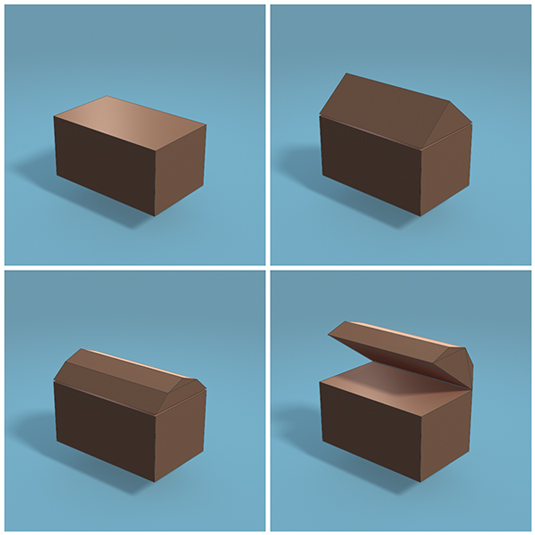
The treasure chest will take a little more work, but is still quite simplistic due to fact you only have a few polygons to play with.
The chest can begin life as a scaled cube, with a pentahedron sitting on top. The upper edge of the lid can then be bevelled to round it off, while also keeping the geometry neat and evenly spaced.
Finally, tilt the lid back a little to tease passing sailors with the booty it holds. That's "Pirate Booty" of course…
04. Trunk

It's back to simplicity as we start to work on the palm tree, using a cylinder to form the trunk.
Start with a low resolution cylinder, with 10 subdivisions round its axis. There is no point going any higher as you will only end up removing the extra geometry later.
Remove the caps as the top and bottom will be hidden anyway, and then shape and taper the cylinder to give you your bent tree trunk.
05. Leaves
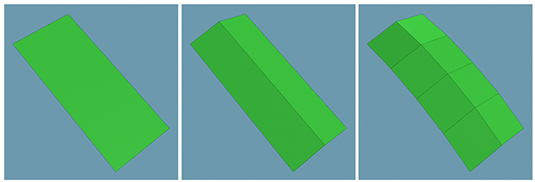
The leaves for the palm tree could be shaped using polygons, but we simply can`t afford that amount of geometry to be used. Instead you can rely on the texture to give you the detail you need with a well painted Alpha map to give you the transparency.
For now though you need some geometry to work onto, and this is where a simple, shaped polygon plane will work well.
06. Combination
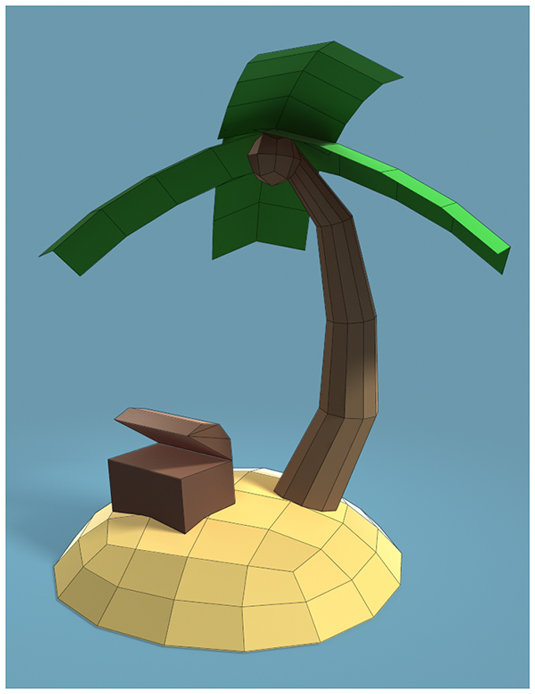
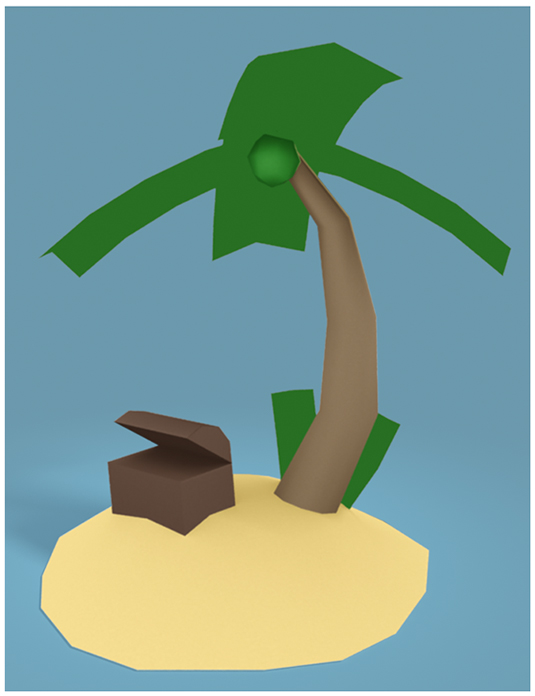
You have the main elements of the scene now so position them to create your treasure island. If it helps, also add some basic colours so you can visualize the scene better, and also include any extras you feel the scene may need.
At this stage the scene should be around 314 polygons, so we are right on budget with some room to breathe.
07. Seamless
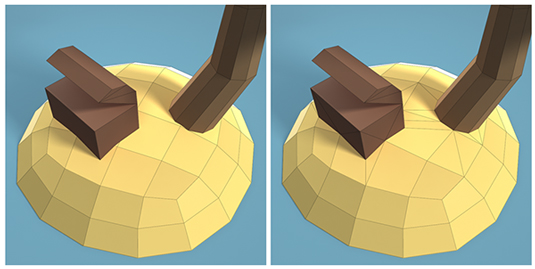
As it stands, the scene is good to go. The only issue is the intersecting geometry of the island, the tree trunk and the chest. Now this may not be an issue with your specific game engine, but you may find that once in game, some of the polygons will fight for domination in the scene and cause flickering.
To help prevent this you now need to combine the models, and simply cut and weld each element together.
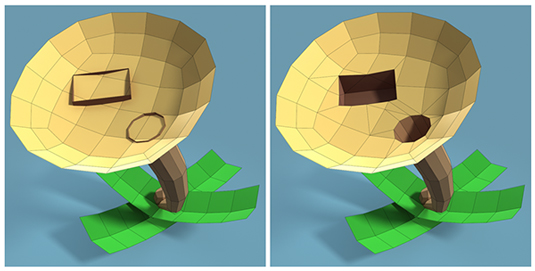
Note: Feel free to skip this step if this isn`t an issue for you, but personally I like to take the time to make a scene like this seamless.
08. Optimise and refine
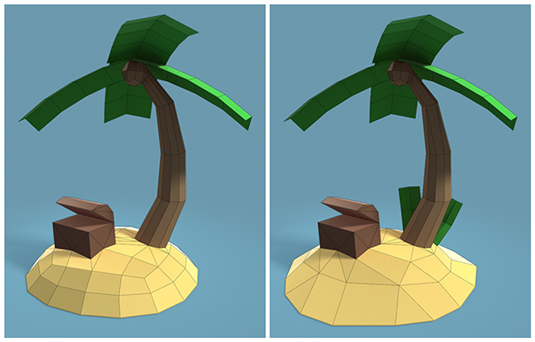
If you took the time to make the model seamless, well done, but you will no doubt have added in more geometry in the process so your polygon count will now be around 334. We are still under budget, but there are areas you can optimize to claw back some geometry which could be used elsewhere.
What you are looking for are areas where you can collapse an edge, or weld a vertex and the resulting area of the model looks almost the same.
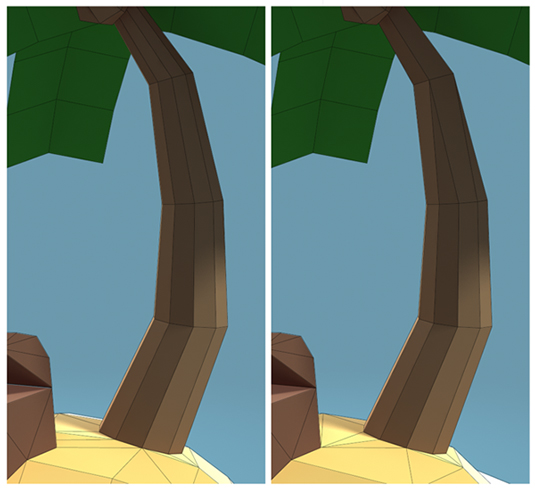
The cylindrical tree trunk can easily be reduced by collapsing edges halfway up. The base of the trunk is where you need the geometry as the circular edge loop where it meets the sand is more obvious
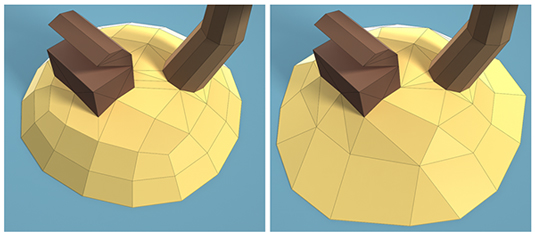
The island can also be reduced quite easily, and this time the overall shape can be tweaked to hide this optimization as well as make it more appealing and less uniform.
09. Not normal
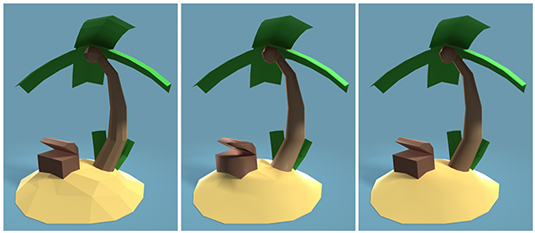
Up to now the model has been built with little attention to its normals. No doubt you have random hard and soft edges across its surface so it's time to take care of those now.
Resetting the models normal initially will turn them all soft, which is how you want the majority of them to be. This will also help highlight any obvious problem areas, like the trunk and the base of the palm tree.
Hardening just the edges in these areas will improve the look of the scene, and help define the different elements.
10. Mapping
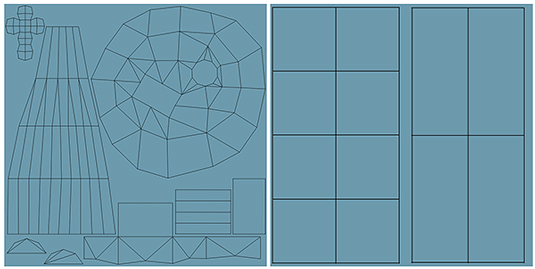
At this stage the model is more or less complete. You should be under the 350 polygon limit, which is great, but also have room to spare should you need any more foliage or props.
Next you need to prepare the model for texturing by applying UV mapping.
There are a number of ways to approach this, depending on the target platform and the style of the model. To keep things optimized and the texture page sizes low you could opt to overlap UV shells so the texture is repeated. This could be used on the tree trunk, the sand and even each side of the treasure chest meaning you only use half the space.
Personally, I feel unwrapping each element will give superior results for this scene and allow for any enhancements to be made in the future, like the addition of a normal map for example. It also makes the scene much easier to take into a 3D painting application and work directly onto.

11. Base textures
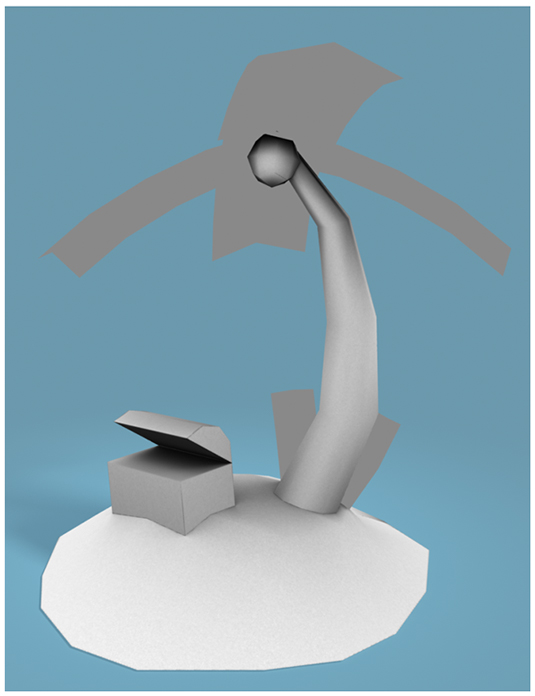
Before you move into your painting application of choice it make sense to bake out a number of key textures to help get you started. Again, unwrapping the UV`s as you did previously makes this much easier, and gives you far better results.
An Occlusion Map will help to bring each element together in the scene while also giving you some basic ambient lighting to work with.
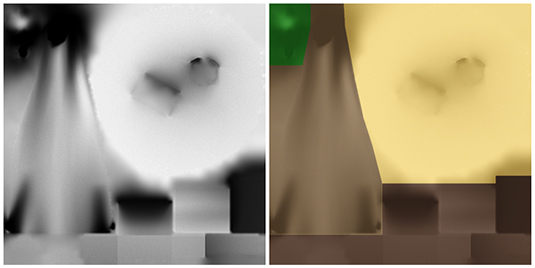
Combining this with a basic Diffuse Map is the perfect starting point for your texture work.
12. Pushing pixels
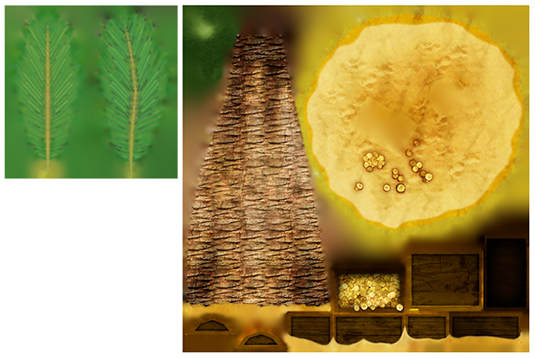
The 3D work is done, so now it's time to focus on those pixels as you dust off your artist skills and paint in some much needed details.
This area comes down to personal skill and preference, but a good way to begin may be to use basic photo reference to block out the main areas of the map.
These can then be painted onto to give you the final look and style you desire.

Antony Ward has been provoking pixels since the early 1990`s. In that time he has worked for some of today's top studios, written three books and created many tutorials both online and in print.
Liked this? Read these!
- Discover the biggest logo design trends
- Download the best free fonts
- Illustrator tutorials: amazing ideas to try today!
The Creative Bloq team is made up of a group of design fans, and has changed and evolved since Creative Bloq began over a decade ago. The current website team consists of five people: Editor Kerrie Hughes (currently on maternity leave), Acting Editor Rosie Hilder, Deals Editor Beren Neale, Senior News Editor Daniel Piper, and Staff Writer Amelia Bamsey. The 3D World and ImagineFX magazine teams also pitch in, ensuring that content from 3D World and ImagineFX is represented on Creative Bloq.
Related articles
how to create low poly models
Source: https://www.creativebloq.com/3d/how-create-low-poly-3d-models-121310159
Posted by: browndowerturs.blogspot.com

0 Response to "how to create low poly models"
Post a Comment